Construction du SOPWITCH CAMEL plan Roger NIETO

Philippe47

Nouveau membre
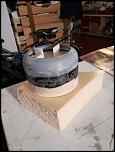
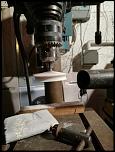
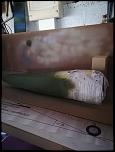
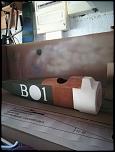
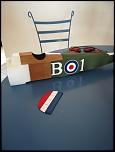
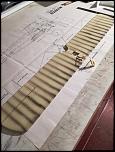
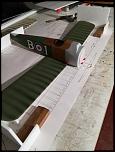
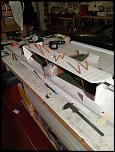
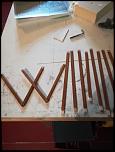
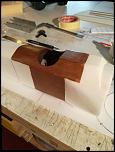
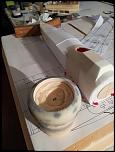
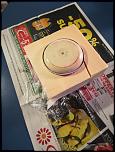
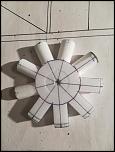
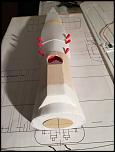
Bonjour j'ai commencé la construction d'un sopwitch en dépron envergure 820 poids 250 gr
thumbnail_IMG_20180304_181618.jpgthumbnail_IMG_20180304_181227.jpgthumbnail_IMG_20180225_112012.jpgthumbnail_IMG_20180217_081634.jpgthumbnail_IMG_20180214_222323.jpgthumbnail_IMG_20180222_224846.jpg
 

Fichiers joints

  • thumbnail_IMG_20180304_181618.jpg
    thumbnail_IMG_20180304_181618.jpg
    137,7 KB · Vues: 63
  • thumbnail_IMG_20180304_181227.jpg
    thumbnail_IMG_20180304_181227.jpg
    163,7 KB · Vues: 60
  • thumbnail_IMG_20180225_112012.jpg
    thumbnail_IMG_20180225_112012.jpg
    162,5 KB · Vues: 61
  • thumbnail_IMG_20180217_081634.jpg
    thumbnail_IMG_20180217_081634.jpg
    226,3 KB · Vues: 59
  • thumbnail_IMG_20180214_222323.jpg
    thumbnail_IMG_20180214_222323.jpg
    201,9 KB · Vues: 54
  • thumbnail_IMG_20180222_224846.jpg
    thumbnail_IMG_20180222_224846.jpg
    132,2 KB · Vues: 58
Bonjour Rat heureux que ça te plaire hier j'ai raté mon message ,voici quelques précision
c'est un plan encarté Modèle magazine n°759
il fait 82 cm d'envergure pour 250 gr avec accus
j'ai plaqué le cockpit avec du balsa 10/10 puis vernis
les roues sont en dépron avec un joint torique de 8 mm
thumbnail_IMG_20180304_092835.jpgthumbnail_IMG_20180302_213118.jpgthumbnail_IMG_20180315_071346.jpg
on attaque la peinture j'ai utilisé la TAMIYA à l'aérographe les cocardes sont faite au pinceau
thumbnail_IMG_20180310_163510.jpgthumbnail_IMG_20180310_163528.jpgthumbnail_IMG_20180310_163940.jpgthumbnail_IMG_20180311_092918.jpgthumbnail_IMG_20180315_071904.jpg
 

Fichiers joints

  • thumbnail_IMG_20180304_092835.jpg
    thumbnail_IMG_20180304_092835.jpg
    150,1 KB · Vues: 56
  • thumbnail_IMG_20180302_213118.jpg
    thumbnail_IMG_20180302_213118.jpg
    198,2 KB · Vues: 52
  • thumbnail_IMG_20180315_071346.jpg
    thumbnail_IMG_20180315_071346.jpg
    181,5 KB · Vues: 58
  • thumbnail_IMG_20180310_163510.jpg
    thumbnail_IMG_20180310_163510.jpg
    189,5 KB · Vues: 55
  • thumbnail_IMG_20180310_163528.jpg
    thumbnail_IMG_20180310_163528.jpg
    169,2 KB · Vues: 53
  • thumbnail_IMG_20180310_163940.jpg
    thumbnail_IMG_20180310_163940.jpg
    188,6 KB · Vues: 54
  • thumbnail_IMG_20180311_092918.jpg
    thumbnail_IMG_20180311_092918.jpg
    101,2 KB · Vues: 58
  • thumbnail_IMG_20180315_071904.jpg
    thumbnail_IMG_20180315_071904.jpg
    214,8 KB · Vues: 60
Il devrait être très joli une fois fini vu ce début.
Le rendu du bois au niveau du cockpit est vraiment sympa.
PS : bien vu l'aspirateur
 
Préparation du chantier et collage des ailes et haubans
thumbnail_IMG_20180315_071318.jpgthumbnail_IMG_20180315_223402.jpg
 

Fichiers joints

  • thumbnail_IMG_20180315_071318.jpg
    thumbnail_IMG_20180315_071318.jpg
    167,1 KB · Vues: 46
  • thumbnail_IMG_20180315_223402.jpg
    thumbnail_IMG_20180315_223402.jpg
    221,5 KB · Vues: 50
Haut